Wednesday, July 24, 2019

How to Keep Your Air Conditioning Unit Running in Top Condition

How to Keep Your Air Conditioning Unit Running in Top Condition
As a homeowner, you are responsible for keeping your appliances in good condition, at least to keep yourself from having them repaired every now and then. Though new AC units come with a warranty, and you expect the manufacturer to sell it in good form, it is your responsibility to maintain it. The warranty may be forfeited if unit problems arise from your negligence and misuse.

Simple steps for maintenance can save your AC from conking out, and you from buying another unit.

1. Turn the power off completely when you are not going to use the unit anymore. Not doing so poses electrical risks and increased energy bills. Look for the shut off box near the unit and turn it off. If possible, switch it off at the breaker box as well.

2. Cleaning your AC unit regularly is a must. Debris can clog the filters and can ultimately cause the unit to malfunction. Dust, feathers, and mold all become breeding grounds for bacteria and could give you respiratory problems. To clean the unit, remove the fan cage and fasteners. Use a wet cloth or dry vacuum to remove the debris from the AC unit’s interior.

3. Remove external dirt with a brush (a toothbrush will do) as you spray water on the fins. Make sure the water stream is gentle enough so as not to damage the fins. There are commercial cleaning sprays available for extremely dirty fins. Use them in place of water and soap. Meanwhile, use a butter knife to straighten the fins out. This step ensures that air flows through the fins, and you can make the most out of your AC unit.

4. Put the fan cage back and clean whatever debris are left in the condenser. During winter, cover the unit with plastic or plywood to keep debris and other elements from falling onto the unit. Leave space along the unit’s sides, to at least let it “breathe”. Completely covering the unit can cause moisture buildup, which in turn could cause malfunctioning.

5. Check the unit’s condenser for any signs of soil settling or rotting. Level the unit and don’t forget to defrost it during winter.

6. You may also need to clean the evaporator coil using a soft brush and a spray cleaner (no-rinse). Clean the drain pan with water and soap. Add bleach if needed, though at most times, water and soap will do. Keep algae from growing in the drain with a drain pan tablet. Clean this drain from time to time, too. Clear it with a wet and/or dry vacuum, then hold the water hose to the end of the drain line. This would wash away all the remaining debris or mold in the drain pipe.

7. Have your blower filter changed twice a year, especially before summer and winter. Use a new filter that has the same airflow rating as your old filter.

8. Lastly, call your HVAC technician for other maintenance procedures. If the problem goes beyond cleaning and washing away debris, calling a technician should be your next step. Experts have the necessary tools and technical know-how to keep your AC unit functioning well.

 

Monday, July 8, 2019

How to Determine if Your Pipes Are Already Worn Out

Regular pipe inspection is important – especially if you live in an old house. Like most other fixtures in your home, your plumbing pipes are also prone to the effects of wear and tear. They will encounter problems as they age. If you fail to check closely, you might not notice indications of problems that may require costly repairs.

You should inspect the areas in your home that you do not often visit such as basements, crawlspaces, and utility rooms. Check for signs that your pipes need repairs or replacement. These include:

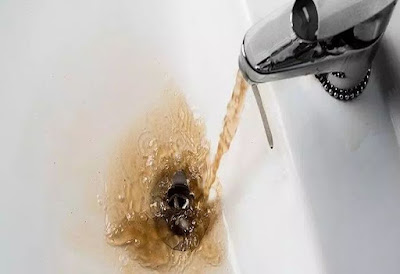
Water Discoloration – You need to contact a plumber as soon as you notice unusual water color coming out of your taps. This may be due to rust, which makes your water unpleasant-tasting. It also hardens the water. When this happens, it will be difficult to rinse soap thoroughly from your skin, dishes, and clothes.

How to Determine if Your Pipes Are Already Worn Out

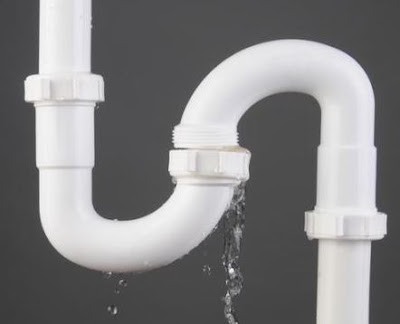
Leaks – Ignoring a seemingly minor leak is a big mistake. This is because it is probably an indication that your pipes already need replacement. Chances are, they are as old as your home itself, and are already showing signs of deterioration.

Plumbing Leaks Repair

You should be wary if you see mildew or mold in the bathroom or anywhere else in your house. A leaking pipe offers the ideal place for mold since it prefers moist surroundings; more so if the leak happens behind a wall or under the floor.

On the other hand, mildew in the shower is often not a cause for alarm. But, if you see it in another part of your home, you may be facing a serious problem. Mildew has a distinctive musty smell. If, after cleaning and scrubbing your home thoroughly, you smell mildew, chances of a leak are high.

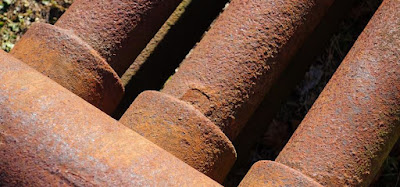
Corroded PipeFlaking and dimpling are indications that corrosion has begun to set in your pipes. Replacement is then in order. High acid content in your water can also corrode your pipes. Leaving copper pipes idle for long periods of time also leads to rusting.

Corroded Pipe

Stains – Check under your sink and on nearby walls for discoloration and stains. These are indicators of potential plumbing issues. If you notice stains on the floor that is directly underneath a bathroom, there may be a leak somewhere. Staining on nearby walls, even if the ceiling is clear, may mean that there is a leak in a pipe further down the line.

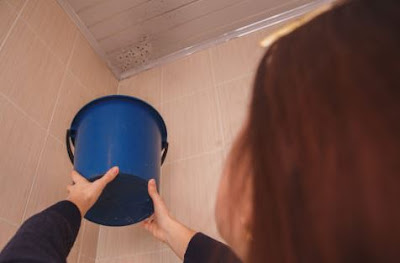
Stains


Inspect your bathroom walls for traces of warping or staining. The drywall may have moistened and is starting to bubble. If this is the case, it will often begin to warp, then slowly break apart. You will need the help of a plumber in Tucson to fix the problem. If neglected for a long time, the drywall may need to be torn down, and this will lead to more expensive repairs.

Keep these tips in mind. These will help you spot worn out pipes that may need immediate replacement. Regular inspection can help prevent more serious damage in the future. If you don’t have the time to check the pipes yourself, having a plumber do it for you would be a good idea.

Related Content: Fix Leaking Faucets in Your Home

Monday, July 1, 2019

How to Fix Your Clogged Toilet

How to Fix Your Clogged Toilet
People use the toilet every single day without bothering to appreciate its importance. But, when it shows signs of malfunction, people panic. This is why having an overflowing or clogged toilet can be a nightmare to many homeowners.

A clog not only damages your toilet. It may also result to expensive repairs to your plumbing and other parts of your home.

Causes of Toilet Clogs and How to Fix Them

When facing a clogged toilet, most homeowners would easily point to improper waste disposal. In reality, there are lots of other possible reasons for clogged toilets. These include:

Throwing too much waste at once
Low water flow
Drain line backup
Toys and other small objects
Sewer line problems
Blockages in the plumbing vent

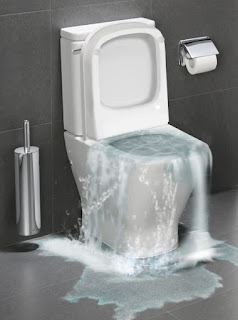
toilet overflows
Some of these are easy to fix, and there is a number of methods you can use. For an old toilet that has low water flow, for example, a replacement may be necessary. Meanwhile, you should use less toilet paper and minimize throwing other waste until you have replaced the bowl. On the other hand, you need to address the other issues right away. Here’s what you should do:

1. Control the overflow – When your toilet overflows, you should not panic, though it is not easy to control your emotions, especially when water has started to damage your bathroom, walls, and floor.

To fix the problem, remove the lid, making sure that the flopper is keeping more water away from the bowl. Then, turn off the water. Make sure it doesn’t flow into the tank. Skip this step if the toilet isn’t overflowing.

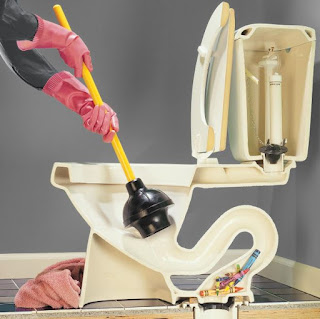
2. Use the plunger – Keep in mind that the type of plunger you use matters. A sink plunger or a cup-ended one will not work in this case because it doesn’t generate the necessary suction. Instead, get a flange plunger. It looks just like a sink plunger, except that its end comes with a lip that will help you insert the plunger into the drain to generate better suction. This will then easily remove the clog.

3. Use an Enzyme Cleaner – If using a plunger fails, then maybe a natural cleaning solution might work. (Liquid drain cleaning chemicals are not recommended by experts because of the harm they can do.) An enzyme cleaner is ideal for use if the clog is made up of natural waste materials. This may not be a quick fix since you need to allow most enzyme cleaners to sit overnight before finally removing the clog.

4. Invest in a Toilet Auger – A toilet auger can reach deep down the toilet base. Because of its flexibility and shape, it can navigate into the drain, getting rid of clogs in the process.

5. Call in the Experts – It’s time to call a professional plumber if all the other methods fail. You may have a bigger plumbing problem at hand, and only a pro can handle it well.

Follow the tips provided in this post. These will be of great help in case you experience a clogged toilet in the future.

If you need to hire a Professional plumber, you can call Spartan Plumbing, Heating & Cooling.

Tuesday, March 12, 2019

Fix Leaking Faucets in Your Home

Fix Leaking Faucets in Your Home
Ignoring a leaking faucet for a long time is not a good idea. For starters, it is not a challenging project to undertake - even when you're not a daily DIY. It would require only basic plumbing skills.

To repair a leaking faucet in your home, you have to identify the way to obtain the leak fist. This fashion, you'll know which parts need replacement or repair. When the leak arises from the tap spout, for example, the source just may be valve seat. If the leak happens near your handle, a packing nut may have some adjustments.


Materials and Tools You'll Need

  • To fix the tap leak, you'll have the following:
  • Phillips/flat-head screwdriver
  • Adjustable and C wrench
  • Penetrating oil like WD-40
  • Nylon scrubbing pad
  • Distilled white vinegar
  • Replacement parts
  • Rags

Procedures to Fix the Leak


1st step: Turn the water off.

Plumbing experts would inform you that this can be important. Turn the fluid faraway from either main water line or under your sink. In case you fail to do this step, it may cause water to shoot out from the fixture.

2nd step: Prepare the tap along with your tools and materials.

Take the time to make your working space. This way, your goal will proceed smoothly with all you need nearby. Wrap your wrench jaws with duct tape to prevent scratching and damaging your fixture since you work.

As the mains water is switched off, activate the tap to get rid of the remaining water pressure. This may also confirm in case the mains water is basically off. Close the drain. To utilize a rag to cover up it.

The 3rd step: Disassemble the tap handle.

Pry the decorative handle knob off of the handle using a screw driver. Set aside the screws below the knob to completely set aside the handle. If the ornamental parts or screws are tough to eliminate, use the WD-40 to loosen them up.

Step 4: Check the packing nut.

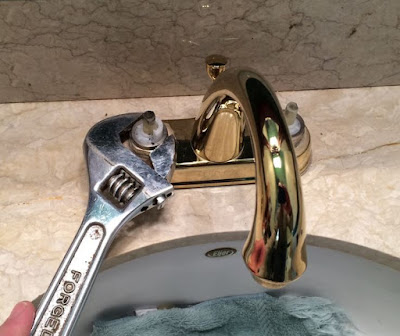
Loosen the packing nut utilizing a wrench. Once loose, that will let stem. Get it dropped by popping or twisting it off the valve. Look at the parts for any sign of corrosion or damage.

Step 5: Check the Washer and O-ring.

When the stem and packing nut are ok, inspect the O-ring and washer found contained in the valve seat.

Fix Leaking Faucets in Your House
Step 6: Clean the valve.

Inspect the valve interior for deteriorated gaskets or mineral deposits. Soak the affected portions in vinegar to loosen the mineral deposits. To utilize a nylon scrubbing pad for cleaning the surfaces. To leverage a pen knife to eradicate clogs in holes in the faucet's body, then flash the debris by placing a rug situated on the faucet. Slightly open the water supply shutoff.

Step 7: Put the faucet back together.

Reassemble your faucet within the reverse order of the way you disassembled it. Ensure you have the correct the volume of the replacement parts.

Step 8: Test your faucet for leaks.

After you have reassembled the faucet, switch the water supply on. Slowly activate the tap to check your repair job.

In case your faucet still leaks, then there is a very good chance that it also is the right time for a replacement or to call a plumber for help.

Monday, February 4, 2019

Kitchen Sink Mistakes

Most homes have plastic drainage systems and most people don't realize the damage they can do to those pipes. Kitchen drains are especially vulnerable to wearing out because of what we put down them. When you dump hot water down your kitchen sink it causes the drain pipe to expand. When it cools down it contracts. The more this is done it causes the drainage pipe to wear out and start leaking.

Since the kitchen is the most common area for this type of damage, keep in mind what you are putting down the sink. If you are draining boiling water then turn on the faucet to cold and let the water run down the drain at the same time. If you are putting food down the disposal then be sure to run plenty of water down behind it. This will also help your drains to stay clog-free and keep all components working properly.


First published here: Kitchen Sink Mistakes